In this section, we will cover the installation and initial setup of Roblox Studio, before we get into roblox programming; we will explore the main interface components, learn basic navigation and tool usage, and customize the workspace to fit personal preferences. So, after completing this chapter, you will be able to:
•Install Roblox Studio (the tool we will use to create your game) on your computer.
•Navigate and understand the Roblox Studio interface.
•Use basic tools and navigation techniques.
•Customize your workspace for a personalized setup.
•Create your first project and understand basic components.
•Perform simple object manipulations.
•Utilize the Toolbox for pre-made assets.
•Write and run your first script in Lua.
Getting To Learn ROblox: Installing Roblox Studio
In this section, I will guide you through the steps to install Roblox Studio on your computer, ensuring that you have all the necessary tools to start your game development journey.
Let’s start with the installation process:
◦Visit the Roblox website and navigate to the Roblox Studio download page: Open your web browser and go to www.roblox.com.
•If you already have a Roblox account, you can press the “Login” button, otherwise, please go through the registration process and follow the instructions.
•Once this is done, you can start to create your first content: Click on the Create button at the top of the page.
Learn Roblox: Creating a new Roblox PRoject
•A new window will appear, as illustrated in the next figure.
•Download the Roblox Studio installer appropriate for your operating system (Windows or macOS): Click the “Download” button in the section “Get Roblox Studio”.
•Save the installer file to your preferred download location on your computer.
•Run the installer and follow the on-screen instructions to complete the installation: Locate the downloaded installer file and double-click it to run the installer.
Learn Roblox: Installing Roblox
•Follow the on-screen prompts to install Roblox Studio on your computer.
•Once installed, launch Roblox Studio and sign in with your Roblox account. If you don’t have an account yet, you will need to create one.
•Open Roblox Studio from your desktop or start menu.
•Enter your Roblox username and password, then clickLog In (same information as for your online account on Roblox.com).
•If you don’t have an account, clickSign Up and follow the instructions to create a new account.
After completing these steps, you should see that Roblox Studio is installed and ready to use on your computer, as per the next figure.
Getting To Learn ROblox: Exploring the Interface
To Learn Roblox and lua programming, you will need to be familiar with Roblox’s interface; So, in this section, we will explore the main components of the Roblox Studio interface to help you become familiar with the environment.
•Please select: File | New; this will open a new project where you can see the Roblox Studio interface.
The Roblox Studio interface consists of several key elements:
•Toolbar: Located at the top, it includes options such as File, Edit, View, and Plugins.
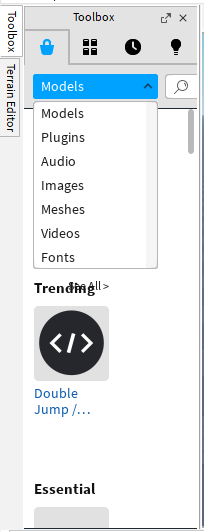
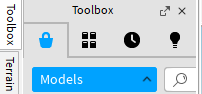
•Toolbox: Found on the left side, it provides access to various models, scripts, and other assets.
Learn Roblox: Locating the Toobox
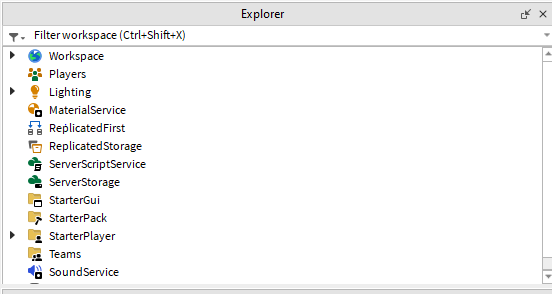
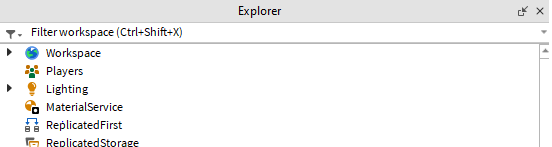
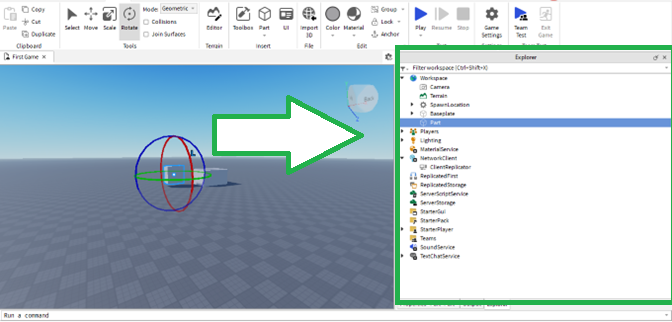
•Explorer: This panel, usually on the right, shows the hierarchy of objects in your game.
Learn Roblox: Locating the Explorer
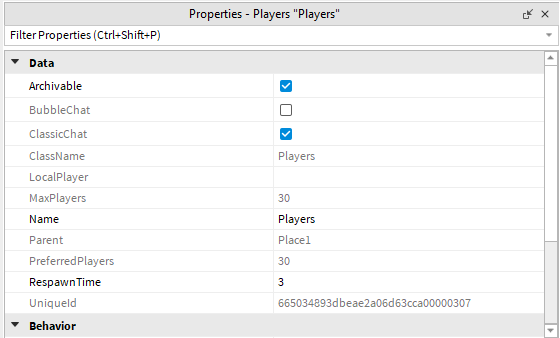
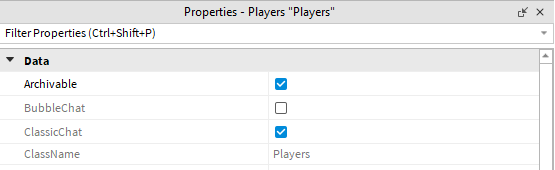
•Properties: Below the Explorer, this panel displays the properties of the selected object.
Learn Roblox: Locating the Properties Window
.
Let’s examine each component in more detail:
•The Toolbar: You can use the Toolbar to access different functions such as saving your project (File | Save), editing objects, and changing the view.
◦File Menu: Provides options to create, open, and save projects.
◦View Tab: Allows you to toggle different panels and tools on and off.
◦Plugins Tab: Enables you to manage and use various plugins.
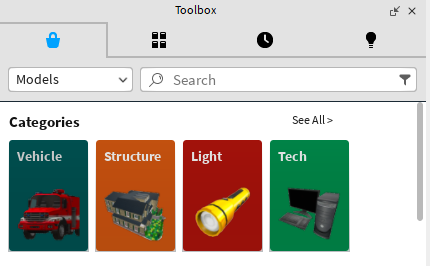
•Toolbox: you can browse through the toolbox to find pre-made models and assets that you can use in your game.
Learn Roblox: Locating the Toolbox Window
To use the toolbox, you can do the following:
◦Click on the Toolbox tab on the left side of the screen.
◦Search for assets using the search bar at the top of the toolbox.
◦Drag and drop assets from the toolbox into the game workspace.
•The Explorer: The Explorer helps you manage all the objects in your game scene.
Learn Roblox: Locating the Explorer Window
To use the toolbox, you can do the following:
◦Click on the Explorer tab on the right side of the screen.
◦Expand and collapse objects to see their components.
◦Right-click on objects to access additional options like renaming and deleting.
.
•Properties: You can adjust the properties of selected objects, such as size, color, and position.
Learn Roblox: Locating the Properties Window
To use the Properties tab, you can do the following:
◦Click on an object in the Explorer and then see its properties in the Properties panel.
◦Modify properties by typing in new values or using the provided controls.
You should now be familiar with the basic components of the Roblox Studio interface. This familiarity is important as it will allow you to efficiently navigate and utilize the tools available for creating and managing your game projects.
Getting To Learn ROblox: Basic Navigation and Tools
In this section, we will cover basic navigation techniques and essential tools within Roblox Studio to help you move around and manipulate objects in your game.
Let’s explore the basic navigation tools:
•Please create a new object (File | New).
•Click on the Home tab from toolbox and select: Part | Block.
•This will create a new object called Part that you can see both in the Explorer, and in the 3D Viewport.
Now that we have created this object, we will operate a series of transformation on same:
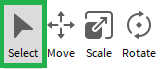
•Select Tool:
◦Click the Select Tool from the Home tab at the top of the screen, as per the next figure.
Learn Roblox: Locating the Home Tab
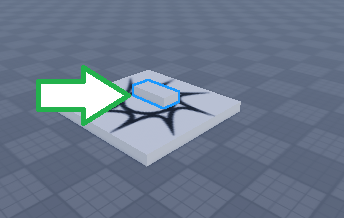
◦Click on the object called Part in the 3D Viewport to select it.
◦Drag the object to move it to a new location. As you do, you should see a hand on this object, symbolizing the fact that you can drag the object.
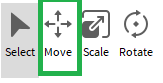
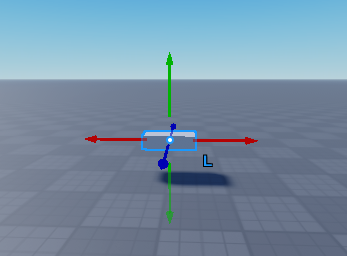
•Move Tool to Move Objects:
◦Click the Move Tool from the Home tab.
Learn Roblox: Locating the Move Tool
◦Click on the object called Part.
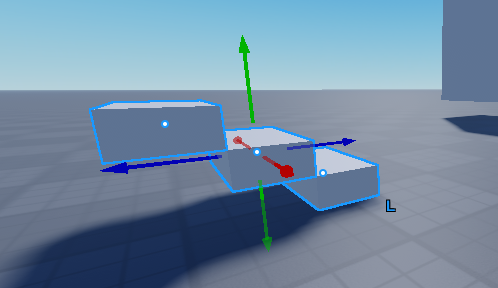
◦Drag the arrows that appear around the object to move it along the corresponding axis: the green axis to move the object along the y-axis (up or down), the red axis to move the object along the x-axis (left or right), and the blue axis to move the object along the z-axis (forward or back).
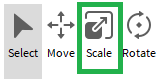
•Scale Tool: Resize objects using the Scale tool.
◦Click the Scale Tool from the Home tab.
Learn Roblox: Locating the Scale Tool
◦Click on the object called Part.
◦Drag the circles that appear around this object to resize it: the green dots to scale the object along its y-axis (up or down), the red dots to scale the object along its x-axis (left or right), and the blue dots to move the object along its z-axis (forward or back).
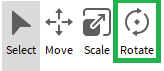
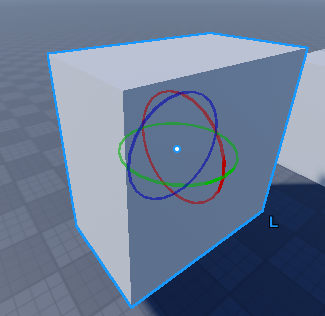
•Rotate Tool toRotate objects and adjust their orientation:
◦Click the Rotate Tool from the Home tab.
Learn Roblox: Locating the Rotate Tool
◦Click on the object called Part.
◦Drag the circles that appear around this object to resize it: the green circle to rotate the object along its y-axis, the red circle to rotate the object along its x-axis, and the blue circle to rotate the object along its z-axis.
.
Now that we have managed to get to grips with basic transformation tools, we will look into how to navigate the workspace.
To navigate the workspace:
•Once the object is selected (in the 3D Viewport or the Explorer), press the key F, this will focus the camera on that object.
•Right-click and drag the mouse to change your view angle: Hold down the right mouse button and move your mouse to look around.
•Press the Mouse Wheel and drag the mouse to Pan the view.
•Use the scroll wheel on your mouse to zoom in and out of the workspace.
•Use the arrow keys or W, A, S, D keys to move around the 3D Viewport: PressW to move forward, S to move backward, A to move left, and D to move right.
After completing these steps, you should see that you can easily navigate and manipulate objects within Roblox Studio. This ability is essential for creating and editing game environments and objects, allowing you to position and adjust them accurately.
Keyboard shortcuts are essential tools that can significantly speed up your workflow in Roblox Studio. By using shortcuts, you can quickly access tools and commands without having to navigate through menus.
In the next steps, we will learn some of the most used keyboard shortcuts in Roblox Studio. These shortcuts will help you work more efficiently by reducing the time spent on repetitive tasks.
Please do the following:
•Move Tool Shortcut: Press CTRL + 2 on your keyboard to quickly select the Move tool. This tool allows you to reposition parts in the workspace.
•Scale Tool Shortcut: Press CTRL + 3 on your keyboard to switch to the Scale tool. This tool allows you to resize parts in any direction.
•Rotate Tool Shortcut: Press CTRL + 4 on your keyboard to access the Rotate tool. Use this tool to change the orientation of parts.
•Duplicate Shortcut: Select an object and press Ctrl + D to duplicate it. This is useful for quickly creating multiple copies of an object.
•Undo Shortcut: Press Ctrl + Z to undo your last action. This is helpful if you make a mistake and need to revert to the previous state.
Now that you’ve learned these essential keyboard shortcuts, you’ll be able to work more efficiently in Roblox Studio. In the next section, we’ll explore the resources and communities available to you as a Roblox developer.
Getting To Learn ROblox: Customizing Your Workspace
In this section, we will learn how to customize your workspace to create a comfortable and efficient working environment.
There are several ways to customize your environment in Roblox, and these include: adjusting panels, adding or removing panels, and saving your layout.
Let’s look at each of these features:
•Adjusting Panels: To adjust a panel, you can drag and drop it to rearrange it as needed. For example, you could do the following:
◦Click and hold the title bar of the Explorer.
◦Drag this panel to a new location (for example at the bottom of the screen) and release the mouse button to drop it, as per the next figures.
Learn Roblox: Locating Attributes
Learn Roblox: Moving Panels
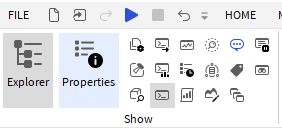
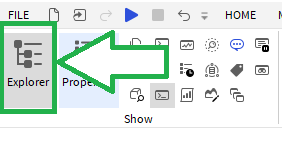
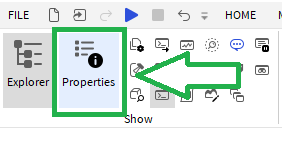
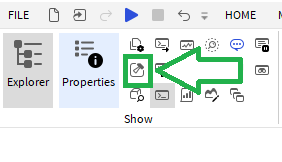
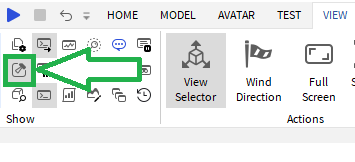
•Add or Remove Panels: To add or remove a panel you can select View | Toolbox | Show and then select the panels that you want to display/hide in your workspace. For example:
◦Select View | Toolbox from the top of the screen.
◦You should then see a section called Show that lists all the panels that can be displayed/hidden in your workspace.
◦Click on the Explorer panel and check that it displays/hides in the workspace.
◦Repeat this step for the panels Properties.
Learn Roblox: Locating Properties
◦Repeat this step for the panels Toolbox.
Learn Roblox: Locating Properties
After completing these steps, you should see that your workspace is tailored to your personal preferences. A customized workspace enhances productivity by keeping frequently used tools and panels easily accessible.
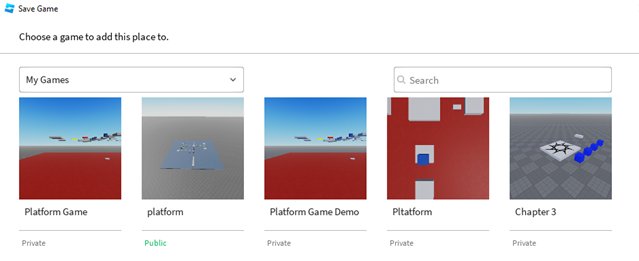
You can now name and save your project:
•Click on File | Save to Roblox As.
•In the new window, press Create New Game.
Learn Roblox: Creating a New Game
•This will open a new window where you can include more information about your project.
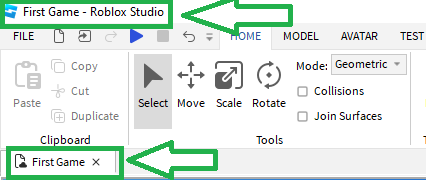
We will be able to change this information later, but for now you can set its name to “First Game” leave the rest of the information as default and press the “Save” button.
As the game is saved and Roblox Studio appears, you should notice that the name that you have defined appears both at the top of the window, and also on the tab for your 3D Viewport, as per the next figure.
Learn Roblox: Creating a New Game
Getting To Learn ROblox: Understanding Basic Components
To Learn Roblox and lua programming, you will need to be familiar with Roblox’s basic components; So, while you are now familiar with the interface of Roblox, we will dive deeper into the basic components of a Roblox project, such as parts, models, and scripts.
Roblox provides what are called Basic Components, which are basic shapes that you can add to your project and combine.
Let’s explore the basic components:
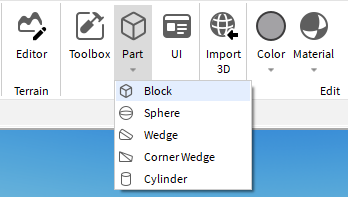
•Parts: parts are the simplest building blocks of any game, and they can be created very easily.
◦Select Part | Block from the Home tab.
◦This will create a new block that you should see both in the viewport and the Explorer.
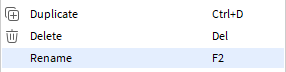
◦Rename this object box1: In the Explorer, right-click on this object, select the option Rename. and type box1.
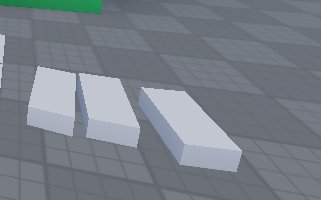
◦Please repeat the previous steps to create two more boxes that you will rename box2 and box3; please also move them apart using the Move tool so that they look like a staircase put together, as illustrated in the next figure.
Note that, to make things easier, you can also duplicate the first box by selecting that object and pressing CTRL + D (duplicate) twice.
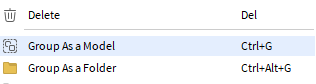
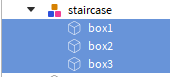
•Models: In Roblox, it is possible to group different parts to form a complete object and this is done through models. To create a model (i.e., a new object that includes individual parts), for example to create an object called staircase, that includes all three boxes created earlier, you can do the following:
◦Select the three boxes by holding the CTRL key and clicking on each box.
◦Right-click on one of the boxes and select Group as a Model from the contextual menu to create a model, as per the next figure.
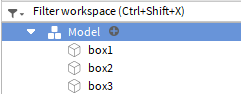
You should then see in the Explorer that a new object called Model has been created, and that it includes the three boxes that we have created earlier.
•We can say, in that case that Model is the parent of the objects box1, box2, and box3, or that these 3 boxes are the children of the object Model.
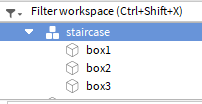
•You can rename the object Model as staircase: Select the object Model, press F2 (or right-click and select Rename), and type the new name.
•Scripts: scripts are pieces of code that add functionality to your game, and they can be added to objects by selecting that object, right-clicking on that object, and selecting the option Insert Object | Script. We will experiment with that feature in the next sections.
After completing the previous steps, you should see that you can add and manipulate basic components in Roblox Studio. These components are fundamental for building and scripting your game.
Getting To Learn ROblox: Using the Toolbox
In this section, we will learn how to use the Toolbox to find and utilize pre-made assets in your game.
Let’s use the Toolbox:
•Open the Toolbox from the left side of the screen.
◦If the Toolbox is not visible, go to View | Show to enable it.
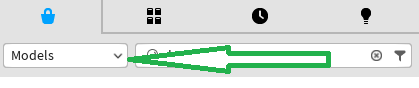
•Search for assets using the search bar at the top of the Toolbox:
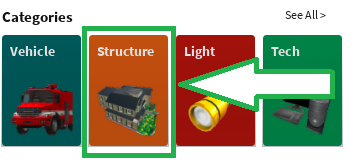
◦Select Models from the drop-down menu located at the top of that panel.
◦Click on the icon labelled Structure, as per the next figure.
◦Type the keyword house in the search field.
◦Browse through the results and select the result called Classic House as per the next figure.
◦ Drag and drop it to your scene (i.e., the 3D Viewport). You should then see that the house has been added to your scene.
•Once this is done, you can look at the Properties window to see some of the attributes of the asset that you have just imported into your game
You can adjust some of these properties, either using the transformation tools (e.g., Move, Rotate, Scale, etc.) or the Properties window.
.
Getting To Learn ROblox: Exploring Your New Scene
Now that you are comfortable with transforming objects and adding assets, it is time to play our scene and see how it will look when played by you and other players.
•Please press the Play button located at the top of the window (blue triangle).
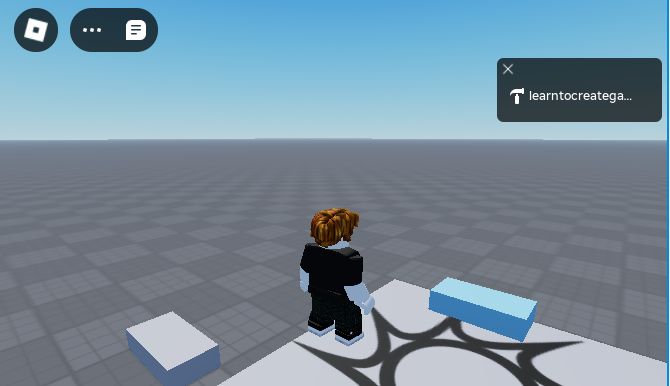
You should see, as per the next figure, your main character and all the elements that you have added, including: a scaled box, a staircase, and a house.
•You can then use the arrow keys on your keyboard, along with the space bar to navigate this scene.
•You can also enter the house and explore inside.
When you want to stop playing the scene, you can press the red square located at the top of the screen or press SHIFT + F5.
One last thing, you may notice that the staircase doesn’t appear correctly, as per the next figure.
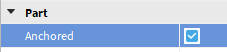
This is because all the boxes that we have created, because they are subject to gravity, have fallen to the ground; to fix this, we can specify that these boxes should not be subject to gravity, and to anchor them; so please do the following:
•Using the Explorer, select each box.
•Using the Properties window, tick the option Part | Anchored.
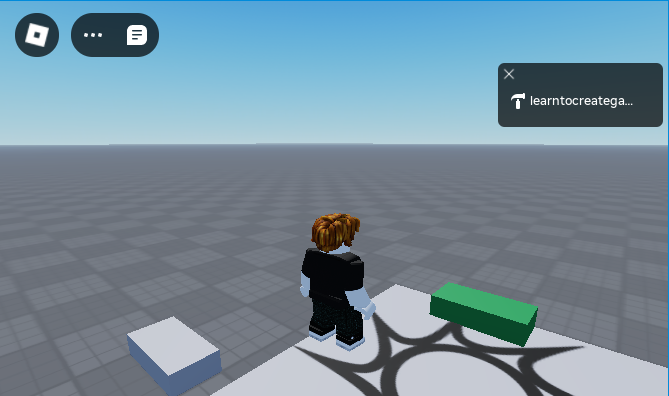
•As you play the game, you should see that the staircase appears properly this time.
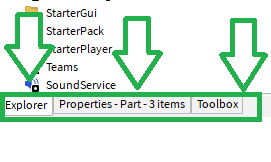
Note that the Explorer, Properties and Toolbox tabs may be displayed under the same window, and you will need to click the relevant tab to display the corresponding information.
Getting To Learn ROblox: Basic Scripting with Lua
In this section, we will introduce basic scripting with Lua, the programming language used in Roblox Studio and write your first script. With this new script attached to an object, we will ensure that every time the player clicks on that object, that its color changes to a random color.
•Please add a new box to the scene: Select Part | Block.
•Rename this new object clickableBox.
•Resize this box along the y axis so that it is easier to click.
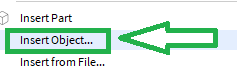
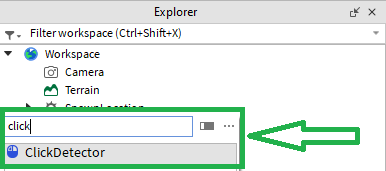
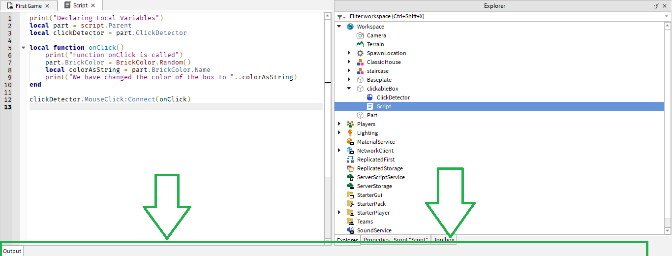
•Add a click detector to this object: using the Explorer window, right-click on the object “clickableBox” then select Insert Object.
•In the new contextual window, type the text “click” in the search field, then select the result “Click Detector” as per the next figure.
•This will add a new component called “Click Detector” to your object and ensure that any click on that object is detected and processed.
Now that we have added the ability for this box to detect clicks, we just need to create a script that will handle the clicks by changing the color of the box whenever this happens.
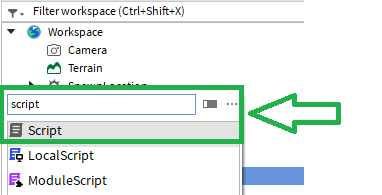
•Using the Explorer window right-click on the object “clickableBox” then select Insert Object
•Type the word “script” in the contextual search field.
•Select the result called “Script” as per the next figure.
•This will create a new script that is attached to the object, and automatically open in the script editor.
•This new script that we are about to write will ensure that we change the color of the part whenever it is clicked.
Note that you can reopen the script later by double-clicking on it in the Explorer panel.
Now that the script has been created, we will modify it so that it produces the behavior that we need (change of color upon clicking).
•Replace the default script with the following code:
local part = script.Parent
local clickDetector = part.ClickDetector
local function onClick()
part.BrickColor = BrickColor.Random()
end
.
clickDetector.MouseClick:Connect(onClick)
In the previous code:
•We declare a variable called part that is the parent of (or the object attached to) the script.
•We then create a function called onClick that, when called, will change the color of the box to a random color.
•Finally, we specify that every time the box is touched (i.e., clicked), we call the function onClick
.
Now that the script has been created, we can save it and play the game to see how it works.
•Save the script and test it (CTRL + S).
•Click Play at the top of the screen to start the game.
•Click the part in the game to see the color change.
.
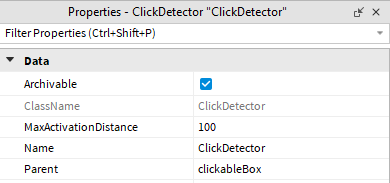
Note that if the clicks don’t work, you can increase the attribute called MaxActivationDistance for the Click Detector linked to the box, as per the next figure:
.
As you’ve seen in the last few steps, basic scripting with Lua allows you to add interactivity and functionality to your game objects. With just a few lines of code, you’ve managed to bring your scene to life. As we continue through the book, Lua will play an essential role in enhancing your game’s interactivity and mechanics. We’ll explore more advanced Lua features in the upcoming chapters to help you further develop your game.
Getting To Learn ROblox: Testing and Debugging Your Script
To Learn Roblox and lua programming, you will need to debug your scripts; so in this section, we will learn how to test and debug your game to ensure it runs correctly and fix any issues that arise.
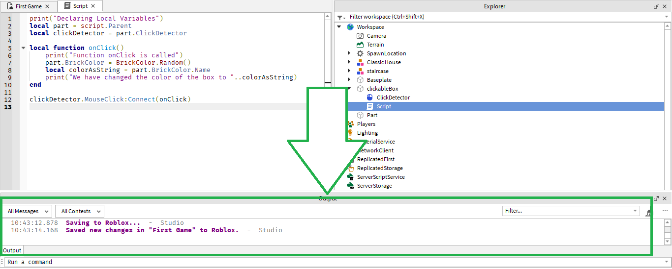
Whenever you write your code, it is often useful to write messages that will be displayed in the Output window, and that will indicate what part of the code has been executed; this way, if there are any issues with the code, you are better equipped to fix it.
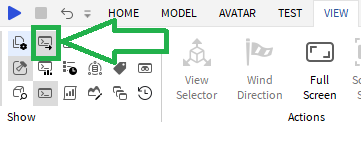
The Output window is where messages can be displayed from the code; you can activate this window (if it is not active yet) by selecting it in the View tab (View | Show). It usually appears at the bottom of the screen by default (after clicking on the Output tab.
•For this you will need to activate the Output window from the View panel as per the next figure.
•You should then see the Output tab at the bottom of the screen
•After clicking on that tab, you should see the messages, as per the next figure.
Now that that its clearer as to how to display the Output window, let’s modify our code:
•Please open the script that you have just created.
•Modify the code as follow (new code in bold).
print(“Declaring Local Variables”)
local part = script.Parent
local clickDetector = part.ClickDetector
.
local function onClick()
print(“Function onClick is called”)
part.BrickColor = BrickColor.Random()
local colorAsString = part.BrickColor.Name
print(“We have changed the color of the box to “..colorAsString)
end
.
clickDetector.MouseClick:Connect(onClick)
In the previous code:
•We write statements that will be displayed in the Output window.
•The first statement tells us that we have declared variables
•The second print statement tells us that we have called the function onClick
•We then declare a local variable that stores the color of the object, as a string
•We then display a message that specifies the color of the object
Now that you have changed your code, you can save it (CTRL + S) and ensure that the Output window is active through the View Panel.
•If you have decided to display your Output window at the bottom of the screen, it should look like the following figure:
•You can now play your scene, and click on the box, and you should see the following messages in the Output window:
.
After completing these steps, you can see that it is possible to include very simple messages in your code that will help you, through the Output window, to debug your code, if and when needed.
Getting To Learn ROblox: Saving and Loading Projects
As you Learn Roblox and lua programming, you will need to regularly save your code; So, in this section, we will cover the proper way to save your work and how to load projects in Roblox Studio.
Let’s save and load your projects:
•Save your project regularly to prevent data loss.
◦Click on File | Save To Roblox or File | Save To Roblox As.
◦If you choose the second option (Save to Roblox As) you will need to select a name for your project.
•You can also load an existing project by opening it from Roblox Studio.
◦Click on File | Open.
◦Browse to the location of your saved project and click Open.
Overview of Roblox Community and Resources
Roblox has a vast and supportive community of developers, along with a wealth of resources to help you learn and grow as a developer. Whether you’re looking for tutorials, forums, or developer tools, the Roblox community has something to offer.
In this section, we will explore some of the key resources available to you, including the Roblox Developer Hub, community forums, and official documentation. These resources will be invaluable as you continue your journey in Roblox game development.
Please do the following:
•Explore the Roblox Developer Hub: Visit the Roblox Developer Hub at developer.roblox.com. This site offers a wide range of tutorials, API references, and tools to help you develop your games.
•Join the Community Forums: The Roblox Developer Forum is a great place to connect with other developers, ask questions, and share your knowledge. You can access the forums at devforum.roblox.com.
•Use the Official Documentation: The Roblox API Reference is an essential tool for understanding how to use different features and functions in Roblox Studio. You can find it at api.roblox.com.
By taking advantage of these resources, you can continue to learn and grow as a Roblox developer. Remember, the community is a powerful tool for gaining knowledge and support as you develop your games
.
.
Summary and Review
In this chapter, we covered the installation and setup of Roblox Studio, explored the main interface components, learned basic navigation and tool usage, customized the workspace, created and saved your first project, understood basic components, performed simple object manipulations, used the Toolbox for pre-made assets, wrote and tested your first Lua script, created a simple game, and debugged it. That’s a long way from where we started, so congratulations on completing this first chapter! In the next chapter, we’ll dive into creating your first game objects and understanding their properties.
Quiz
Please guess whether the following statements are True or False (the solution is in the section Answers to Quizzes, at the end of the book).
1.Can Roblox Studio be installed on both Windows and macOS?
2.Is the Menu Bar located at the top of the Roblox Studio interface?
3.Can you find pre-made models in the Toolbox?
4.Is the Explorer panel used to manage game objects?
5.Does the Properties panel allow you to change object properties?
6.Can the Select tool be used to move objects?
7.Are the arrow keys used to navigate the workspace?
8.Can you customize the layout of your workspace?
9.Is it possible to save your custom workspace layout?